

You've just finished a job that looks solid in person. The room's clean, the lines are straight, the customer's happy, and you grab one quick after shot on your phone because that's all the time you've got before you're onto the next site. Then the post goes up, gets buried, and you're left wondering why a good job didn't turn into a good enquiry.
That's usually the moment people realise before and after photos aren't just pictures. They're field evidence. Used properly, they show proof of work, context, and outcome. Used badly, they look like a random glamour shot that could've been taken anywhere.
The trade businesses that get traction online usually aren't posting prettier photos, they're posting clearer proof. Social platforms are flooded with images, with people uploading about 300 million photos to Facebook each day and around 95 million photos to Instagram each day, roughly 26 images per second across those platforms, and image-heavy posts have been reported to get 352% more engagement than text-only Facebook posts, while image-rich content was said to earn 94% more views than content without a photo (history and photography statistics). In that noise, a tidy transformation only works when the framing, timing, and caption all line up.
Table of Contents
- Why Most Before After Posts Fall Flat
- Building a Repeatable On-Site Capture Setup
- Shooting the Before and After Frames
- Editing Without Misleading the Viewer
- Captions, Layouts, and Posting Formats
- Consent, Property, and Advertising Rules
- A Weekly Posting Rhythm and Self-Audit
Why Most Before After Posts Fall Flat
The flat posts are easy to spot. A tradie wraps up a job, snaps one clean after photo from the best angle, writes something like “Another one done,” and hits publish. The work might be excellent, but the post still looks like a finished-room photo, not proof that anything changed.
What's missing is the comparison. Without a real before image, the viewer has to trust you on faith, and faith is thin on social feeds where people are scrolling fast and judging faster. In practice, that means the post shows outcome without process, which is weaker than showing both.
The problem is usually framing, not skill
Most of the time, the job itself isn't the issue. The problem is that the camera angle changes, the lighting shifts, or the after shot is taken from a more flattering spot, so the viewer can't compare the two frames cleanly. That's exactly where before and after photos earn their keep, because the format works as proof only when both sides match.
Practical rule: if the viewer can't tell what changed in three seconds, the post is decoration, not evidence.
That's why the strongest trade posts feel specific. They show the old condition, the fix, and the result in a way that a stranger can understand without being on site. For a useful example of how branded posts can be structured around trust rather than filler, see what branded content looks like in practice.
The rest of the system is simple. Lock the capture method, keep the edit honest, write captions that describe the job instead of overselling it, and post on a rhythm the business can maintain. When those pieces line up, the same photo pair stops being a throwaway upload and starts acting like a sales asset.
Building a Repeatable On-Site Capture Setup
A studio setup sounds nice until you remember most trade jobs happen in tight bathrooms, dusty plant rooms, roof spaces, driveways, and half-lit kitchens. The answer isn't better gear, it's a fixed routine that works anywhere. A phone, a small tripod or solid resting point, and a couple of floor marks will do more for consistency than any fancy camera you don't have time to carry.
Set the station before the job starts
Pick a reference point you can return to later, like a doorway corner, window frame, or cabinet line. Mark the tripod feet or standing position on the floor, then decide the camera distance before the first shot so you're not guessing during the after. Clinical guidance recommends diffused neutral-white light in the roughly 5000 to 5500K range, with fixed focal length and steady distance to reduce perspective error (clinical photo setup guidance).
That doesn't mean you need a lighting kit. On many jobs, the most accurate result comes from ambient daylight or the most even available light, not from blasting the scene with harsh work lights that flatten detail and create weird reflections. The point is consistency, not a showroom look.
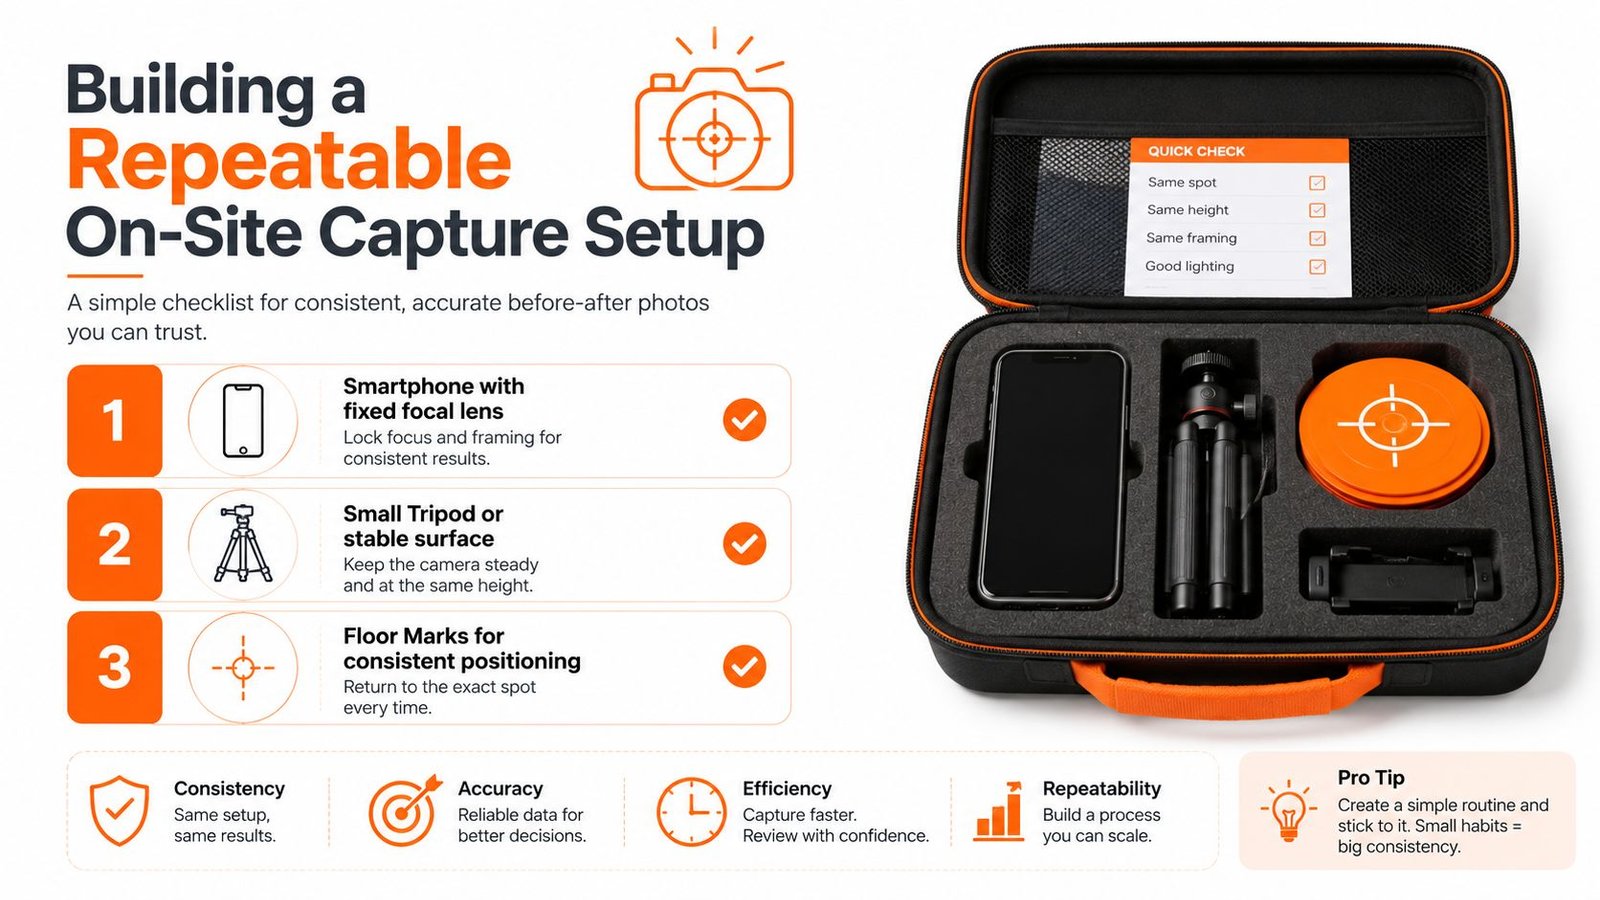
Keep the setup boring. Boring photos compare well, and comparison is what sells.
Make the second visit almost automatic
The win is speed. On the first visit, you spend a few extra minutes placing the tripod, checking the frame, and noting the angle. On the second visit, you come back to the same marks, same distance, same reference point, and the photo takes almost no extra time.
That's especially useful when the site is awkward. In a dim roof cavity, use the strongest even light you can get and avoid changing your position just to chase brightness. Outdoors, watch for shifting sun and don't trust a patch of shade on one day to match another day unless you can recreate it cleanly.
A fixed setup also makes it easier to spot drift later. If the framing starts sliding, you'll notice it immediately because the doorway edge, benchtop line, or wall junction won't line up the way it should. That's the difference between a repeatable field protocol and a random camera habit.
Shooting the Before and After Frames
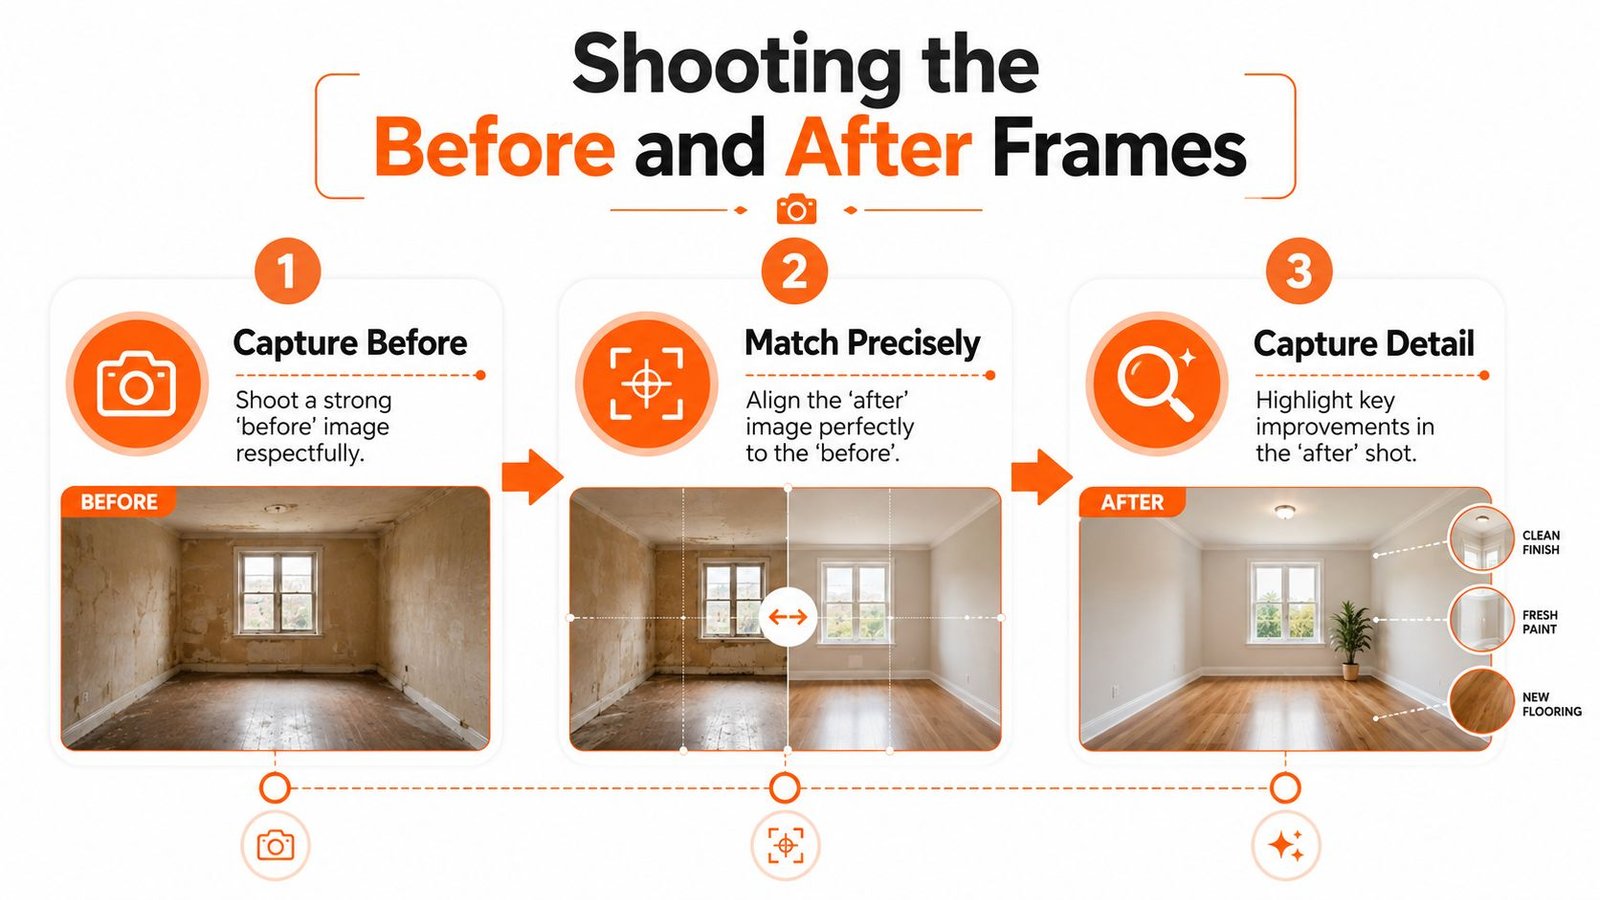
The best before shot doesn't flatter anyone. It records the existing condition without ambiguity, so the viewer can see what was there before the work started. If the customer sees that as honest, the after shot feels more credible too.
Start with a wide shot, then add detail
For contractor photo documentation, a useful before image should give enough context for a stranger to understand the scene, then pair cleanly with the after shot from roughly the same spot, using clear reference points like a doorway corner or window frame (contractor photo documentation guidance). That usually means one wide shot plus a couple of detail shots, not ten random angles that never line up again.
The wide shot tells the story of the space. The detail shots show the work itself, like a new run of pipework, a switchboard, a patch repair, or a fitted cabinet line. If the viewer can only see the finish, they miss the transformation. If they only see the close-up, they miss the scale.
Match the after to the before, not the other way around
The after image should come from the same position, same angle, same height, same distance, and ideally the same focal choice. That locked capture protocol matters because even small changes in camera position can make the result look better or worse than it really is (repeatable before after capture guidance). If you want the photo to hold up under scrutiny, the frame has to hold still.
A simple habit helps here. Shoot three matching frames per view, then choose the cleanest pair later. That gives you a buffer for motion blur, a hand in the frame, or a light change you didn't notice on site.
Practical rule: if you wouldn't trust the comparison when the two images are swapped side by side, don't post it.
I also keep a quick note of the capture conditions, especially on jobs where the lighting changes during the day. That way, if a later post looks off, you know whether the issue was the framing, the exposure, or the site itself. For more practical framing examples, this photo guide for tradies is worth keeping on hand.
Editing Without Misleading the Viewer
Editing should clean up the comparison, not rewrite it. A lot of trade photos go wrong here because the after image gets treated like an ad image, with brighter walls, heavier contrast, and a crop that subtly removes awkward context. That might look punchier on the phone, but it weakens the proof.
Keep corrections technical, not transformative
The safe edits are the boring ones. Straighten the frame, match the crop, correct exposure so both images sit at a similar brightness, and fix white balance if one shot has a warm cast and the other doesn't. Best-practice guidance on before-and-after images says credibility depends on controlling lighting, background, angle, and distance, while keeping edits minimal and limiting acceptable changes to comparison aids like straightening, matching crop, and equal exposure correction (best-practice image guidance).
What doesn't belong is anything that changes the result. Don't reshape features, remove relevant details, or make the after look stronger than what was present on site. If you've had to make a meaningful colour correction, label it clearly instead of letting the viewer assume the scene was captured that way.
Choose the file that survives compression cleanly
A side-by-side file often travels better than a stitched collage with too much text or too many tiny details. On busy platforms, compression can make a crowded layout messy fast, so keep the comparison readable at phone size. Three matching frames per view help here too, because they give you options when one pair looks too dark, too soft, or too cropped.
The point is simple. The edit should remove distraction, not add persuasion. If the transformation only looks good after heavy manipulation, the post has crossed from documentation into sales fiction, and that hurts trust far more than a slightly imperfect photo ever will.
Captions, Layouts, and Posting Formats
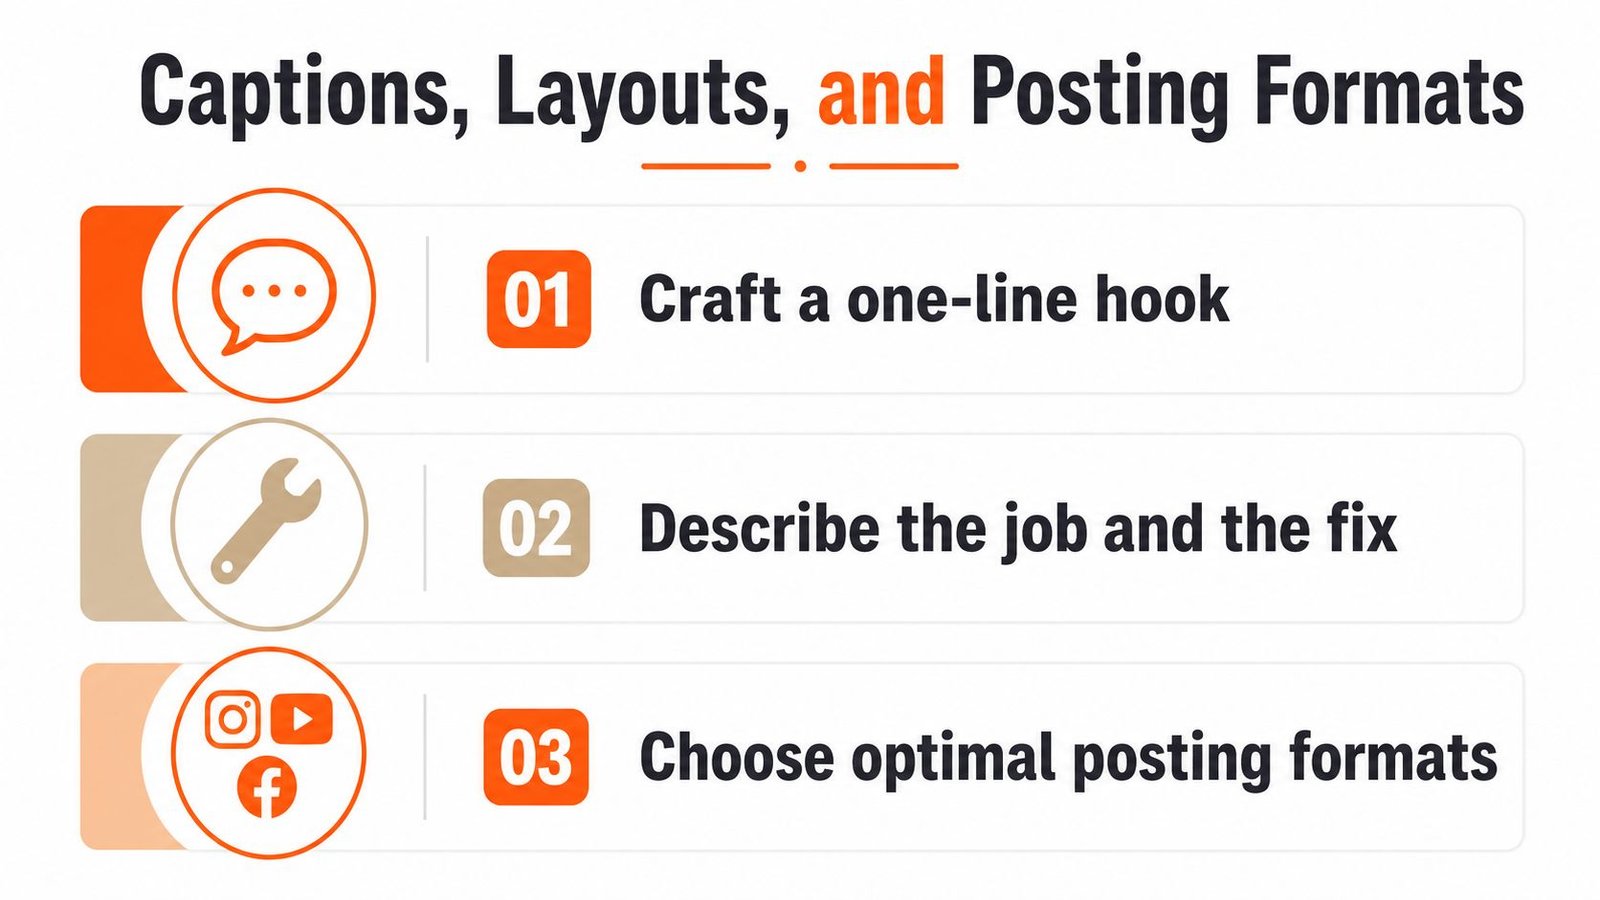
A good pair of photos still needs a caption that sounds like a working job record, not a radio ad. The easiest structure is a hook, a plain job description, the problem and the fix, then a soft prompt that invites a reply without sounding pushy. That format keeps the post grounded in what happened on site.
Use a caption shell you can reuse
Try this structure:
- Hook: one short line that names the result or the issue.
- Job context: where the work was done and what type of job it was.
- Problem and fix: what the customer had and what you changed.
- Soft close: a simple line that invites questions, quotes, or local enquiries.
For example, a caption can say what was installed, repaired, upgraded, or replaced, then mention the suburb or area naturally in the sentence if it belongs there. Keep it specific to the service and the outcome. If the caption reads like it was written for everyone, it usually lands with no one.
Match the layout to the photo story
Side-by-side works well when the change is obvious and the frame lines up cleanly. Before-above-after can work on feeds where people scan fast, while a carousel suits jobs that need one progress shot in the middle. Wider framing tends to preserve more context than a tight square crop, especially when the scene includes surrounding surfaces, fixtures, or room layout.
Hashtags should stay local and service-based rather than stuffed with generic labels. A few clear tags tied to the trade, the location, and the job type usually do more than a long cloud of random terms. The goal isn't to look busy, it's to make the post easy to find by the right people.
Write the caption like you're explaining the job to another tradie, not pitching it to a stranger who's never been on site.
Consent, Property, and Advertising Rules
The legal side gets ignored until someone complains. On a real job, that usually means you've got a tenant, a business name in the background, a person in the frame, or a photo that reveals more about the site than you meant to show. If the post is going anywhere public, the safer move is to think about permission before you think about the caption.
Know when written permission matters
If a person is identifiable, if a branded business is visible, or if the property is private in a way that makes the image sensitive, get permission in writing. A finished room shot might seem harmless, but a number plate, family photo, distinctive signage, or a visible occupant can shift the image from simple documentation into something that needs a proper release. For a trade business, that doesn't have to be complicated, it just has to be clear.
A short consent note can cover who owns the image, where it can be posted, and whether the customer can revoke permission later. Keep it plain and specific. If someone says no to being shown, respect that and crop the scene tighter or use a different job.
Treat advertising claims as proof-backed statements
Under the UK CAP Code, before-and-after photos are treated the same way as testimonials, so advertisers need signed, dated proof that the images are genuine and unmanipulated, and the images must not exaggerate the product's efficacy (ASA guidance on before-and-after photos). FTC guidance says the images must accurately represent typical results or clearly disclose when results are not typical, and the underlying claim needs competent and reliable scientific evidence if the photo implies a broader benefit (FTC advertising guidance summary).
That matters even outside regulated industries because the same logic applies. If the photo makes the job look easier, cleaner, or more complete than it really was, the audience will feel the mismatch. A strong image can still mislead if it hides the context that made the result possible.
The safest rule is blunt. Show what was done, keep the presentation consistent, and don't let a polished image imply a promise you can't stand behind.
A Weekly Posting Rhythm and Self-Audit
The easiest way to keep this sustainable is to stop treating posting as a special event. One before and after pair a week is enough to keep the account active if you're choosing finished jobs as you go. A monthly audit then tells you whether the system is holding up or drifting.
Use a small rhythm you can repeat
| Cadence | Action | Output |
|---|---|---|
| Weekly | Pick one finished job, pair the before and after, and write a short caption | One clear post that shows real work |
| Monthly | Review the last ten posts for framing, lighting, caption quality, and consent notes | A cleaner, more consistent library |
| As needed | Remove or rework any post with weak context, poor permission, or misleading edits | Lower risk and stronger trust |
That kind of rhythm is the same logic behind content batching. You're not trying to create a perfect post every day, you're building a repeatable file of proof that can be published without starting from scratch each time. If you want to think about that workflow in a broader posting system, this guide to content batching fits the same mindset.
Keep a short self-audit checklist
- Consent file saved: permission is documented before the post goes live.
- Capture log present: the job, angle, and conditions are noted.
- Edit stayed within limits: straightening and exposure matching only.
- Comparison still reads clearly: the transformation makes sense at phone size.
- Caption sounds like the job: no hype, no vague filler, no overclaim.
The long game matters more than a single spike. Consistent, honest before and after photos do the selling while you're on the next site, which is exactly where a trade business needs its content to work.
GrowTradie helps trade businesses keep this kind of proof flowing without having to plan every post from scratch. If you want your before and after photos turned into consistent local content that looks sharp and stays active between jobs, visit GrowTradie and see how it fits your workflow.